HTML Elements
1.3.2. HTML Elements
At the heart of every web page is HTML, the structural language that pages are written in. HTML elements consist of a wide variety of “tags”, which wrap around content. As a general rule, you have an opening tag, which looks like this: <title>
And a closing tag, which encloses your content, and looks like this: </title>
These HTML tags nest inside one another, beginning with the main element, which is <html>. All of your page content sits inside a set of <body> </body> tags.
Page content is generally structured using a variety of tags, each with its own behaviours, styling and so on. For example, headings are in <h1></h1>, <h2></h2>, <h3></h3> … etc – meaning “heading size 1”, “heading size 2”…
HTML Hierarchy
Certain tags always nest inside other tags – for example, lists <ul> (an “unordered list”) and <ol> (an “ordered list”) always have a series of <li> elements inside them, <li> stands for “list item”. So the HTML markup would look like this:
<ul>

<li>My list item</li>

<li>A second item</li>

</ul>
Understanding HTML “hierarchy” – or the way that tags are nested – is important for writing selectors. This is because when you target a selector you need to give an “address”; i.e. a place within the HTML it can be found.
The way we do this is by saying, for example “this element can be found in the <body> of the page, inside an unordered list <ul>, in the second list item <li>”.
Each of the main ways of writing selector follows this pattern. Some are simpler than others, but as you’ll discover when writing User Journeys, sometimes it’s not always possible to use the simple ways due to how web pages are written and/or generated.
How to View HTML
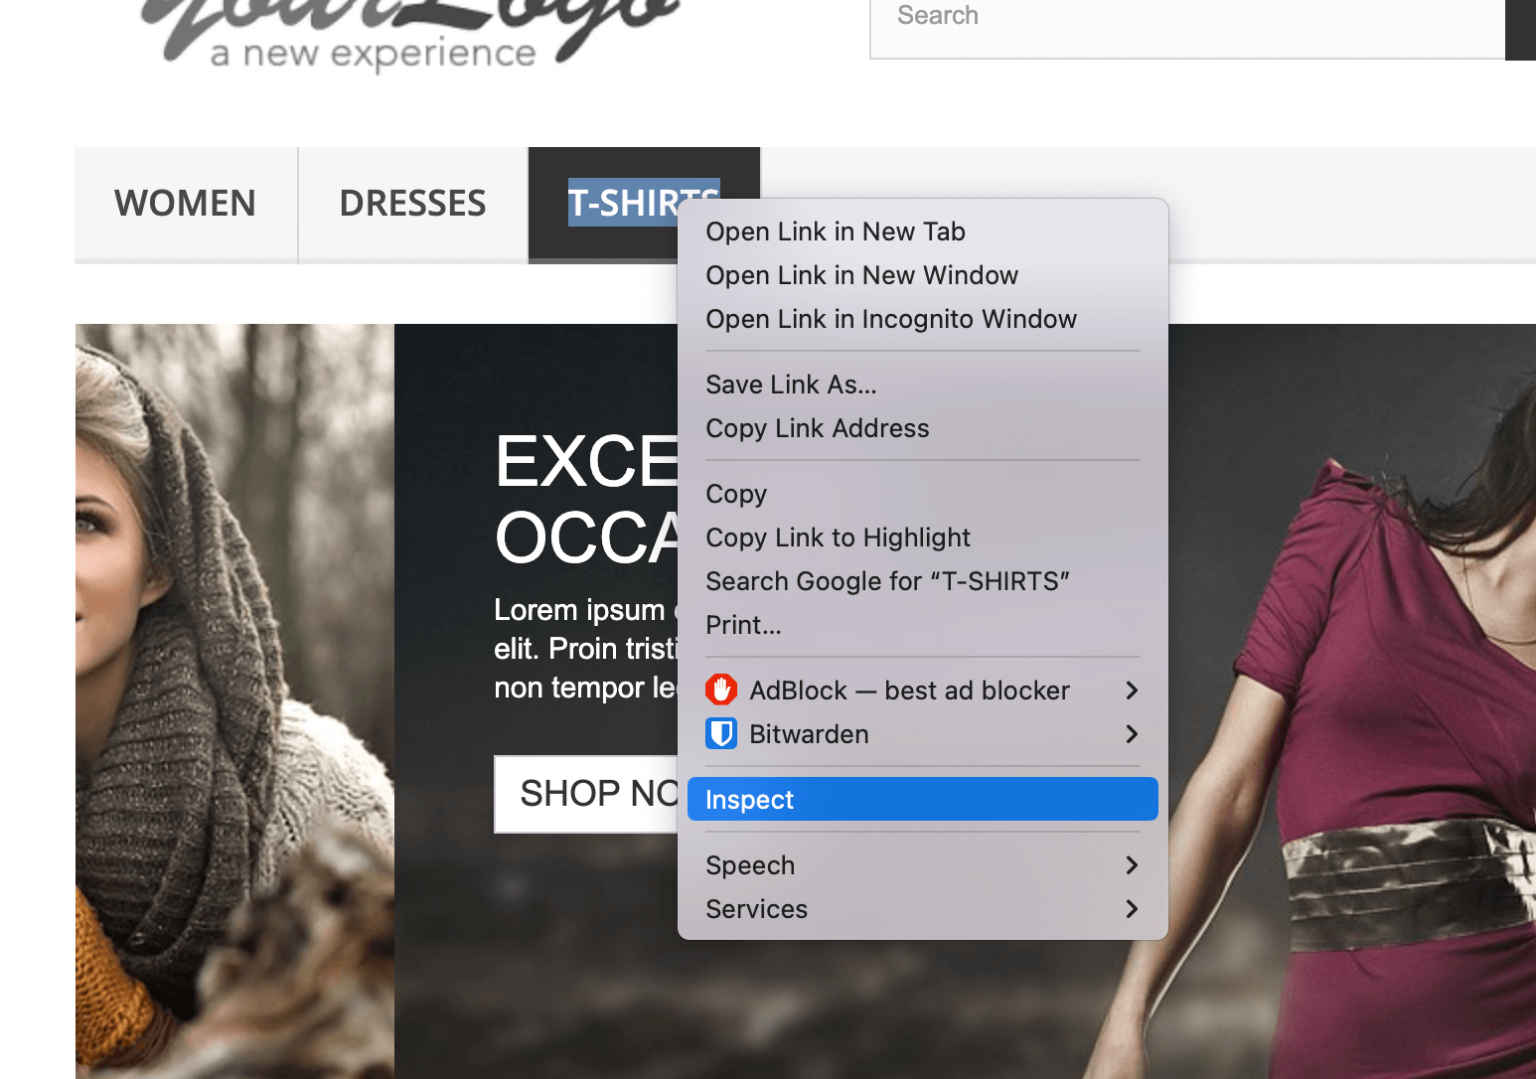
When writing a User Journey we recommend having RapidSpike open in one tab and your website in another tab. When looking at the site, you can view the HTML elements making up the page by right clicking anywhere on the screen and selecting “Inspect” (most browsers support this feature).
This will open a window showing you a number of developer tools, including an “elements” view showing you the HTML of your site.

Right-click, Inspect in Google Chrome
This is extremely useful for writing selectors – we’ll return to it later.
How to Target HTML Elements
Hopefully we now have an understanding of HTML elements and how they are used to make up a web page. How does this relate to writing selectors?
As mentioned at the beginning of this section, when writing selectors we have a variety of ways to “target” selectors. This is because HTML element tags can be made up of a number of parts. For example:
Sometimes you’ll get a simple tag like this:
<a href="https://example.com/another-page">Click me</a>
This is an anchor tag, or <a> tag. They’re used to create links to other websites or pages, and are one of your most common script targets for “click” actions.
In the HTML, the opening tag <a> has an extra attribute defined: href. This is simply telling your browser where you want to go when the link is clicked. href attributes are mostly exclusive to <a> tags.
However there are other attributes that tags share that are used for other purposes. For example,
<h1 class="blue">A Big Heading</h1>
This heading tag has a class attribute on it. Classes are usually used to define style through CSS (Cascading Style Sheets). Classes can be used on any tag and are extremely common. They’re also a way to target an element, basically by saying “target the element that has this class on it: ‘blue'”.
Back to our <a> tag example:
<a href="https://example.com/another-page" class="link-to-another-page" id="anotherpage">Click me</a>
We can target this link a number of different ways. We can target the element itself <a>. We can target the class “link-to-another-page”. And we can target the ID “anotherpage”. We can also target the whole text “click me”, or part of the text, e.g. “click” or “me”.
An Important Note
Choosing the correct target is often key to writing a good reliable selector. there are drawbacks to some methods, as we’ll discover. The first thing to bear in mind is simple: avoid writing a selector that might match more than one HTML element on the page, otherwise your User Journey script may not know which one to interact with.
For example, if you chose to write a selector to click on the <a> element – there will likely be lots of <a> elements on your page! You will need to pick a selector that is more specific.
Next, let’s look at the simplest HTML selector first: the ID.
Links:
- W3Schools – Learn Basic HTML – https://www.w3schools.com/html/