Failure Analysis
Failure Analysis
The failure analysis tab should be the first place you check on a failing User Journey.
Failure analysis allows you to identify what is causing your user journey to fail by comparing a passed and failed test side by side.
You can find it under Test Results by going to the Failure Analysis tab. Here you can select the type of data you want to compare between tests:
On the visual screen, you can see video recordings and screenshots from each test. You can identify differences between them. For example, you might spot a new pop-up that is stopping the user journey from interacting with the page. This is usually the first thing to check.
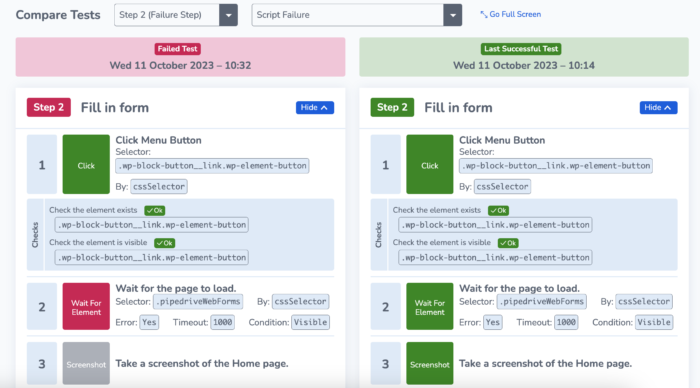
The Script Failure tab shows you the user journey script and highlights where it has failed. You can compare this with the passing test to identify any issues with the current script. You can also view screenshots as they are captured throughout the journey. If you did not see the problem on the visual tab, then you can go to the Script Failure tab to see if the issue is apparent.
Top Tip: Make sure to include plenty of screenshots in your script as this can be very useful

The elements tab shows you a list of elements that are loading on each step of the journey – allowing you to identify discrepancies between both test runs. Maybe there are elements missing or loading incorrectly?
There are also the Waterfall and Browser Log tabs. Read on to find out more about these tabs.
Further Reading